It’s pretty easy to clone a Raspberry Pi SD Card on a Mac, but takes a LONG time (32GB took 3 hours to backup and 10 hours to restore via my iMac).
Category Archives: Linux
Very cool, can’t wait to try this out.
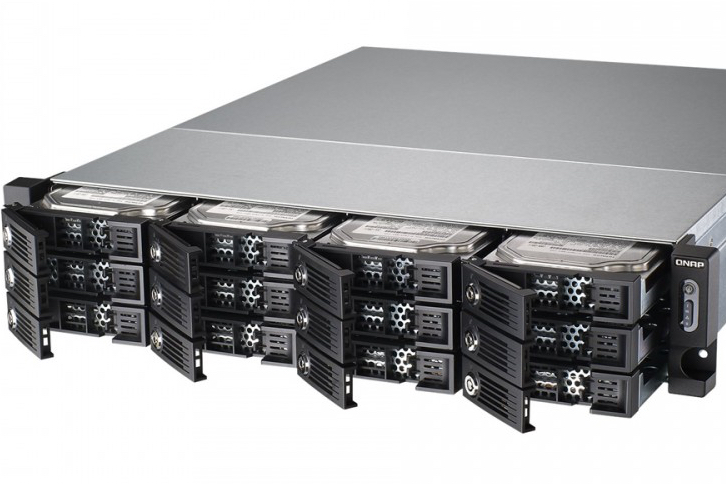
I found a good hard drive solution for the QNAP TVS-1271U-RP-i5-16G. Going with:
Need to find a string nestled somewhere in a ton of subdirectories? First cd to the lowest common denominator, then run:
grep -lir “something” *
Don’t forget to remount in rw mode:
mount -o rw,remount /
Also, cron needs to be started:
/opt/etc/init.d/S10cron
It is SO easy to create a new virtual server from a Netinstall ISO. Downloading the DVD or CD ISOs can take a long time. Netinstall only pulls down the packages you need.
Step one, download the Netinstall ISO from the vendor. I prefer CentOS. (version 5 is only
Upload it to the datastore
Create new Virtual Machine
Choose custom
Name it
Pick your destination datastore
Pick the guest OS ( I use RHEL 5, 32bit)
# Procs, Ram, NICs, LSI Logic SCSI Adapter, HD size, etc.
Finish it out with the defaults.
Right click on the new VM and Edit Settings
Select the CD Drive, check “Connect at power on” change to Datastore ISO file and browse to the Netinstall ISO.
Click on options tab, select boot Options
Check the “Force BIOS Setup”
Click OK, boot the VM and go to console. BIOS will be waiting on you.
Go over to Boot option in Bios and move the CD-ROM Drive to the top of the list.
Exit, save.
CentOS installer will start.
On “Installation Method” screen, choose HTTP.
Web site name: mirror.centos.org
CentOS directory: /centos-5/5.3/os/i386/
Obviously, your version may be different.
It will start a download of “images/stage2.img” (it may take a while depending on your connection speed…typically around 5 mins on a DSL/Cable Modem).
From there, the process is like any other install.
Need to transfer a really large file but are worried that it will fail before completing?
Create a multi-part file using the split command, then join it on the remote server after it transfers. Example: Start with a zipped file (somefile.zip), then run…
split -b 10m somefile.zip someprefix-
That will take somefile.zip, chop it into 10MB pieces and name them “someprefix-aa, someprefix-ab, etc.” Run “man split” for all the options:
split -b number[ k|m ] [-a suffixlength] [filename [prefix] ]
If your file will be split into more than 52 pieces, you’ll need to change the number of suffix length. The default is 2 (a-z, twice).
After transferring the pieces to the remote server, re-assemble them with cat…
cat someprefix-aa someprefix-ab ... > somefile.zip
Having problems getting iSCSI LUNs to appear in ESXi after enabling a second VMkernel switch on a separate subnet? Make sure you disable/re-enable the ESXi iSCSI Initiator AFTER adding the new vSwitch on the isolated network. I think iSCSI discovery only occurs on the Vswitches enabled at the time the initiator is enabled. Here is my scenario:
I recently setup an MD3000i SAN to connect to our VMware ESXi hosts via iSCSI on our internal LAN. My test server only has two NICs, but I only enabled eth0 with an IP of and left eth1 unused. I enabled iSCSI on the host, set send targets, config’d host access, created host-to-virt disk map, etc. and rescanned HBA. The test worked fine. After scan completed, I was able to see the LUNs in ESXi.
Next, I wanted to enable eth1 and move the iSCSI traffic off to dedicated, isolated, switches.
So I physically moved the MD iSCSI cables to 2 standalone switches, edited the MD Host Ports, setting them back to the defaults (192.168.130.x & 131.x). I left the two MD management ports in the LAN.
I enabled ESXi eth1 as VMkernel and set to IP in same range as one of the segments (192.168.130.103).
On ESXi, I removed the old send targets and entered the new IPs (192.168.130.101 & 102).
Rebooted everything for good measure. Rescanned HBA, but the LUNS did NOT show up in ESXi.
The solution? After enabling the VMKernel switch on the different subnet, disable ESXi iSCSI Initiator and reboot (maybe not needed, but I find ESXi likes a reboot for many things). When it returns (5+ minutes for mine), ENABLE the ESXi iSCSI Initiator and rescan HBA. I think iSCSI discovery only occurs on the Vswitches enabled at the time the initiator is enabled.
At work, I was unable to access my Ensim control panel (on RHEL4); the browser kept timing out. So I thought I’d restart it to see if that would fix it. I did the usual:
/etc/init.d/epld restart
And got this error
Stopping Ensim Pro For Linux Control Panel [ OK ] Stopping Ensim Pro For Linux SSL Tunnel [FAILED] Starting Ensim Pro For Linux Control Panel [ OK ] Starting Ensim Pro For Linux SSL Tunnel [FAILED]
I checked the log file and see this:
cat /usr/lib/ensim/frontend/httpd/logs/error_log
…No space left on device: mod_rewrite: could not create rewrite_log_lock
Problem Found
A quick google search told me it was a semaphore problem. So I ran the ipcs command to check my config:
ipcs -l
—— Semaphore Limits ——–
max number of arrays = 128
max semaphores per array = 250
max semaphores system wide = 32000
max ops per semop call = 32
semaphore max value = 32767
Then ran the ipcs command to see how many were semaphores were left:
service httpd stop
ipcs -s | grep apache | wc -l
It showed 110. Not 128, but maybe enough to cause problems. PLUS, it “should” be zero with apache stopped.
Solution
With apache and epld stopped, I ran this command
ipcs -s | grep apache | gawk ‘{ print $2 }’ | xargs -n 1 ipcrm sem
Then started apache/epld again. All is fine.
service httpd start
/etc/init.d/epld start
While trying to run a YUM update on a CentOS server today, I got an error message about my /boot partition being full. I ran a df -h and sure enough, there was only 100k left. (My standard install uses 100MB for the boot partition.)
Here’s what I did to fix it.
rpm -q kernel
That returns a list of installed kernel updates. In my case I had more than 25…
kernel-2.6.9-22.EL
kernel-2.6.9-42.0.8.EL
kernel-2.6.9-42.0.8.plus.c4
kernel-2.6.9-42.0.10.plus.c4
…
kernel-2.6.9-67.plus.c4
kernel-2.6.9-67.0.1.EL
kernel-2.6.9-67.0.1.EL.plus.c4
kernel-2.6.9-67.0.4.plus.c4
kernel-2.6.9-67.0.7.plus.c4
kernel-2.6.9-67.0.15.plus.c4
kernel-2.6.9-67.0.20.EL
To remove some of the older ones, run:
yum remove kernel-2.6.9-42.0.10.plus.c4
or to get several at one time:
yum remove kernel-2.6.9-42.*
I recommend leaving a few of the older ones in case you need to revert one day.